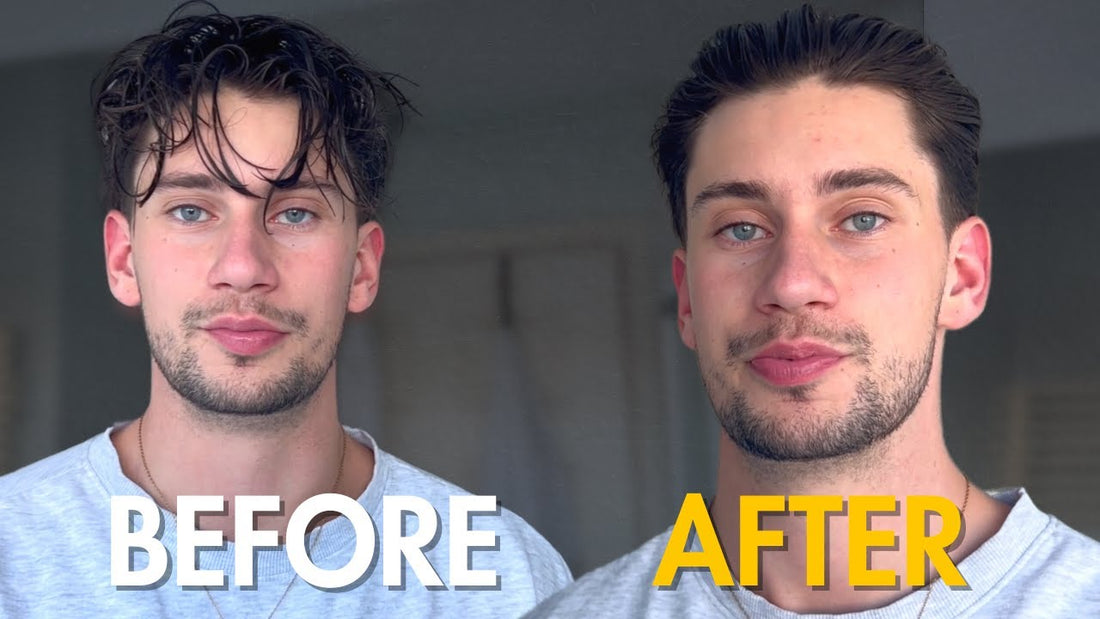
Hey everyone! 👋 Gavin here, your friendly barber from Dublin. Today, I’m sharing my daily hair routine—a style I’ve been rocking since March. I’m not even sure what to call it. It’s kind of a hybrid: a middle-parted slickback. Let’s call it the “Slick-Mid,” yeah? 😄
This style is super easy to pull off, so grab your favorite Poseidon products, and let’s get into it!
Step 1: Prep Your Hair 🚿
First things first: wet your hair. Whether you’ve just hopped out of the shower or given it a quick rinse, this step is key. With damp hair ready to go, take a round brush and start brushing your hair straight back.
Step 2: Sea Salt Spray Magic 🌊
Time to bring in the hero product— Sea Salt Spray. This stuff is a game-changer for adding texture and hold. Here’s what I do:
- Give the bottle a good shake. (Don’t skip this bit, seriously!)
- Use a scrunching motion with your fingers to work the spray through your hair.
- How much should you use? It really depends on your hair. Experiment with a little, then a lot, until you find your sweet spot.
Trust me, this product delivers every time. If you haven’t tried it yet, you’re missing out.
Step 3: The Power of Poseidon’s Grooming Clay 🧴
Next up is the Grooming Clay. I’ve got the new packaging here—super slick and shiny—but I’m using the classic one today. Here’s how:
- Take a tiny amount (about the size of a pea, maybe even less).
- Rub it evenly between your hands.
- Work it through your damp hair using the same scrunching motion.
- Don’t forget the back! Your hair needs a solid foundation to sit on.
Pro tip: Sometimes, I flip my head upside down while applying to make sure I’ve covered everything.
Step 4: Blow Dry Like a Pro 💨
Grab your hair dryer—any one will do! I’m using a Dyson today, but honestly, it’s not a must-have. Here’s my blow-dry strategy:
- Start by blow-drying your hair in the opposite direction of where you want it to sit. I know it sounds odd, but it ensures the hair underneath dries properly. (It’ll look funny for a minute, but trust the process. 😂)
- Once that’s done, blow-dry your hair straight back. You’ll notice it sits much easier and looks way more natural.
I keep the dryer on low speed and medium heat to avoid frying my hair.
Step 5: Finishing Touches with Grooming Clay ✨
Almost there! Your hair might look a bit too blow-dried at this point. To fix that, take another tiny bit of the Grooming Clay:
- Rub it evenly in your hands again.
- Work it through your hair, focusing a bit more on the front to keep everything slick and tidy.
And voilà! No more “hair-dryer-y” vibes—just a clean, polished look that’s ready to take on the day.
Final Thoughts 💭
That’s it, folks! My daily hair routine, done and dusted. If you found this guide helpful, drop me a comment, and let me know what you think. If you’re curious about the Poseidon products I used, they’re all linked here on the site—highly recommend giving them a go!
I’ll be sharing more hair styling tips soon, so keep an eye out for new content. In the meantime, thanks for stopping by, and I’ll catch you in the next one!
Cheers,
Gavin ✂️


