

Introduction: Hey there! It's Gavin here, and if you're new to my channel, welcome! I specialise in creating fantastic hair styling tutorials. Over the past few months, I've been on a journey to grow out my hair, and it's finally gotten long enough to experiment with some new styles. Today, I'm excited to show you how to achieve the trendy and timeless middle part hairstyle. But before we dive into the styling process, I want to mention that the products I use in this tutorial are from Poseidon Hair, and you can find them all linked in the description below.
Step 1: Start with a Fresh Wash The foundation of any great hairstyle is clean hair. So, to get started, I'm going to wash my hair using Poseidon Hair's Argan Oil shampoo and conditioner. These products are fantastic because they gently cleanse your hair without stripping away its natural oils. I usually shampoo and condition my hair around two to three times a week to keep it healthy and looking its best. Now, I'm off to take a quick shower, and I'll be back in a jiffy.
Step 2: Towel Scrunch Dry With my hair freshly washed, I'm going to gently scrunch dry it with a towel. This technique helps maintain the natural texture of the hair, which is essential for the middle part style we're aiming for. Just pat and scrunch your hair until it's mostly dry.
Step 3: Create the Middle Part Using a brush or comb of your choice, comb your hair straight back to create a focal point. Then, locate your middle part by going straight down the center of your head. This will give your hair that clean and defined parting we want for this look.
Step 4: Add Texture with Sea Salt Spray Now, for a crucial step in achieving that effortless middle part style, we're going to use Poseidon Hair's sea salt spray. I'm using a travel-size bottle, but apply as much as you need for your hair. Spray it evenly all over, ensuring you don't miss any spots. Then, scrunch the product into your hair with your hands, creating as much texture as possible. Remember to get the back and sides as well.
Step 5: Scrunch Dry with a Diffuser To lock in that textured look, use a hair dryer with a diffuser attachment. I'm using the Dyson hair dryer, but any will do the trick. Start scrunch drying your hair with your hands, beginning at the sides and working your way up to the top. This step will help set your hair in place and give it that windswept finish.
Step 6: Add Grooming Clay for Texture To enhance the texture even further, apply a small amount of grooming clay from Poseidon Hair. Take a bit on your fingertips and rub it in. Then, scrunch it into your hair, distributing it evenly. This step ensures your style holds up all day and gives it that extra oomph.
Step 7: Optional Volume Boost If your hair tends to fall flat, like mine, you can add a bit of volumising dust at this point. Just sprinkle it into your hair and scrunch again to add some lift and volume.
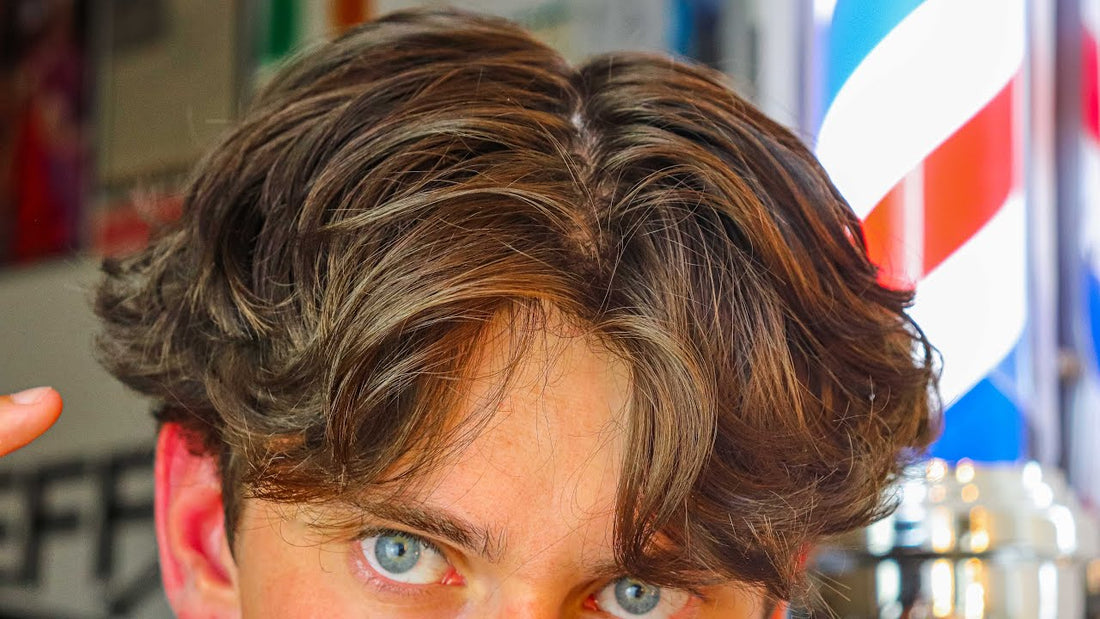
Step 8: Admire the Finished Look And there you have it – the perfect middle part hairstyle! I hope you like the final result. If you want to try this look for yourself, all the products I used in this tutorial are linked above. By supporting Poseidon Hair, you're also supporting my channel and helping me create more fantastic tutorials like this one.
Conclusion: If you enjoyed this tutorial and found it helpful, please give it a thumbs up. Don't forget to hit the subscribe button if you want to see more hair styling tips and tricks. Also, leave a comment below and let me know what other styles you'd like me to try in future videos. Thanks so much for watching, and I'll catch you later with more awesome hair inspiration!